一直想搞个 VPS 来外网测试自己的 Rails 小程序,在 V2EX 上 浏览了一圈,发现大家使用的 VPS 比较集中在 Linode , DigitalOcean 上,遂决定在这两个里面选择一个。
鉴于 Digital Ocean 比较便宜, 5$ 一个月,而且新用户可以使用优惠码冲 10$,相当于免费使用两个月了 ;–), 所以决定试用 Digital Ocean。
选择主机
登录 DigitalOcean 之后,先要 CREATE 你的 VPS 主机的类型,选择节点,以及系统的 Image.
我选择的是 5$ 的那个套餐, 512M/1CPU/20G/1TB, 节点选择 Sanfrancisco , 系统的 Image 选择的是 Ubuntu 12.04, 然后系统上其他的东西都是自己装的。
不过今天发现,原来在 Select Image 的时候还可以选择预装一些 Application
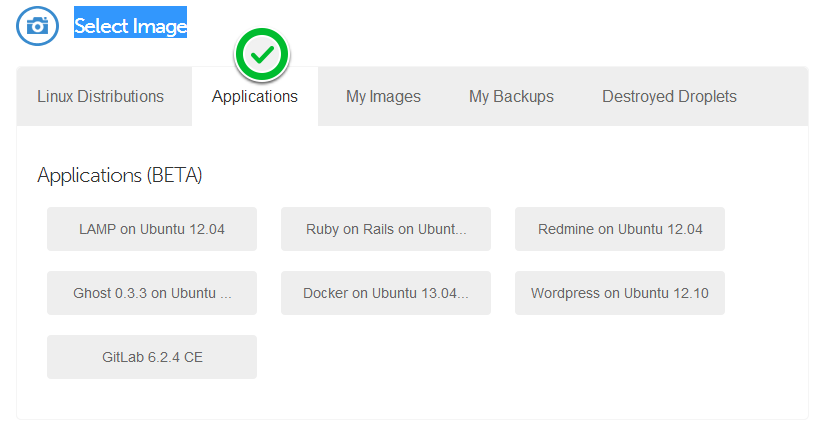
预装的 Ruby on Rails 使用的是 Ngnix + Unicorn ,如果想快速部署的话可以考虑下。
新建用户
当你创建完成之后,DigitalOcean 会 Email 给你 VPS 的 IP, Username 和 Password 。但是 Username 是 root, 用这个超级用户来进行日常操作是不太合适的,所以我们需要新建自己的用户。
1
| |
-d 指定 HOME 目录 home/your_user_name
-m 创建 HOME 目录,如果没有的话
-s 指定 shell 类型
为新用户创建密码
1 2 | |
创建之后,需要将这个用户加到 sudoer 里面去
1
| |
然后切换到 your_user_name 登录。
安装 Ruby on Rails
安装 Ruby on Rails 常用的有两种方式: rbenv 和 rvm 。似乎 rbenv 会更干净一点,但是我觉得 rvm 更简单一点。
1 2 3 4 5 6 7 8 | |
然后 clone 下你的 project , 安装 gems ( Rails 在里面)
1 2 3 4 5 6 | |
这个时候,使用 rails s 启动自己的 rails application 应该没问题了,当然别忘了 rake db:migrate
Apache2 + Passenger
虽然调试的时候可以使用 WEBrick 这个 模块来提供 HTTP 服务,但是,一般发布的时候,我们都会选择性能更好更稳定的 Apache 或者 Nginx , 貌似后者更猛一点。不过我还是选择了 Apache。
Passenger 似乎可以单独作为一个服务器,也可以辅助 Apache 或者 Nginx。使用 Apache2 + Passenger 可以让你发布 app 简单的一毛啊。
1 2 3 4 5 6 7 8 9 10 11 12 13 14 15 16 17 | |
执行 passenger-install-apache2-module 的时候,会打印出如下的配置信息(会因环境有所差异):
LoadModule passenger_module /home/goodluck/.rvm/gems/ruby-2.0.0-p247/gems/passenger-4.0.23/buildout/apache2/mod_passenger.so PassengerRoot /home/goodluck/.rvm/gems/ruby-2.0.0-p247/gems/passenger-4.0.23 PassengerDefaultRuby /home/goodluck/.rvm/wrappers/ruby-2.0.0-p247/ruby
然后把这段贴到 /etc/apache2/httpd.conf 文件中去,然后添加 apache2 的配置
1 2 3 4 5 6 7 8 9 10 11 12 | |
将两个 /home/goodluck/work/rshare/readingbooks/public/ 改成自己的,如果是 development 模式需要添加 RailsEnv development ,这行后面不要添加注释。
Done !
Thanks for your reading and welcome your comments. Drop email to zhibinwang.q@gmail.com to contact me.